I could not wait to try and make these. So yesterday we had a huge snow storm so I figured what a great time to bake! So when I decided to make these I realized the only ingredient I had on hand were Sprinkles =(. So I had to brave the storm to go the Craft Store and Shoprite. After spinning in a complete circle on the snow/ice while driving about 20 mph, I finally got my ingredients. All for the love of CUPCAKES! =). So mine are far from perfect and next time i'm going to try some different techinques but i just loved making them , I think the inperfections make them what they are, but i'm a perfectionist and want them to be flawless. And OH MY do they taste good.
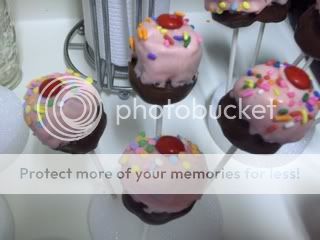
So here are some photos of my little cuppy cake cuties:
So first off we have my beloved ingredients. I know I mixed up Betty and Dough Boy, I couldn't decide ok?!? For the flower shaped cookie cutter, Bakerella uses a 1.25'' one from Williams Sonoma. I used a 1.5'' Wilton one. Next time I make these I will be using the smaller one. The bigger the cutter the more cake you need to use for each pop and some of mine got too heavy and were sliding downt the lollipop stick.

chocolate and pink vanilla candy melts.

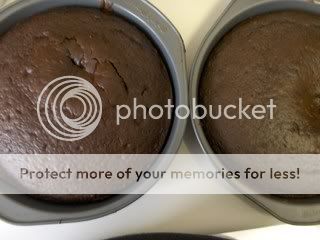
So first you have your lovely baked cake....

After it's cool you DESTROY it!!!! BAHAHAH... And add some cream cheese frosting.

Then you roll them into little sticky messy balls. About the size of your flower shaped cookie cutter.
Again: When you make these it's best to use a cutter 1.25 inches in size. The only one I was able to find was 1.5 inches. When I got to the point of dipping in pink vanilla melts, I had some difficulties with them being too big and heavy and sliding down the stick.

After frezzing them for about 15 mins (you want them very firm). Push them half way through the flower cutter..So you form the base of the cupcake and have a mound on top.

Freeze them again for another 15-20 mins, While you are waiting set up your chocolate to dip. When everything is all set take your cupcake shape and dip the base into the chocolate. (I was finding that i had to spoon some of the mixture onto the cupcake because the chocolate would weigh the cupcake down and it strectched when I tried to pull it up out of the chocolate. ) While the chocolate is still wet stick your stick in it! HAHA. You can also skip the stick and have them little bites. Stick them on wax paper upside to dry (20 mins)

Now you want to get your pink melts ready. Dip the top half of the cupcake in the pink. ( I didnt turn it rightside up right away I let it drip off a little so that it didn't cover all the chocolate.) Bakerella says if you let the pink sit for a few mins it will help from dripping too! Add a red m&m and some sprinkles, stick in styrofoam and let dry for another 20 mins.

SO CUTE! I KNOW!!!!!!! =) Wrap them up with a plastic treat bag and pretty pink ribbon!

Overall, I would say they came out nice I would have liked them to be smaller because of the problem I had after dipping into chocolate. But that's ok! I love them. I will definitly make them again! VERRY SOON! Make sure you head on over to Bakerella's Pop Central
to get full instructions and see hers!!!!!!!
